How to Make a Piano
What goes into the creation of a piece of artwork? By the time you as the viewer get to see a creation, all you see is the completed vision of the artist. No matter what the medium of the artwork, there is so much more to art than what meets the eye. So, here is a glimpse into my process of creation.
I am currently working on a piece that I have yet to title. For now, I am simply calling it “Piano.” The first part of the process of creation is getting the idea. I’ve wanted to do a large scale piano piece for several years, but nothing really inspired me, until now. The Colony Theater in Burbank, California has chosen me as the guest artist during the run of their production of “Two Pianos, Four Hands.” As I talked about in a previous newsletter, in this case, creativity is inspired by a deadline, and, of course, years of piano lessons as a child.
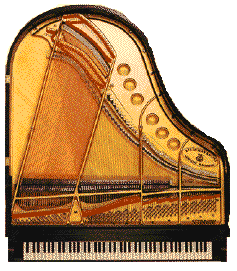
So, what happens once I have the idea? First, I spend several days researching pianos. I look at them from the outside, from the inside, and from every conceivable direction. The image that keeps sticking in my brain is the view from above the piano with the lid off. I let this image percolate for a while.
|
Now, I don’t want to just faithfully recreate a piano. Besides, doing every single string would be tedious, not to mention time consuming. Also, this piece needs to hang on the wall, so a full 3-D sculpture is out. But, I could do a wall sculpture. Ah, ha! I think I’ve got it! A piano frame complete with keyboard and hinged lid. Inside, instead of all the strings, put in sculptured notes and musical symbols.
Next, how do I make this idea work? Off to Home Depot. (I’ve been there 5 times over the course of this project. Good thing there is one close by.) I need something stiff enough not to bend, not so brittle that it breaks, not too heavy, and easy to cut and shape. As I walk the aisles, nothing looks like it will work. Back to Google. |
|
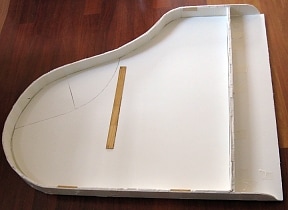
During another unsuccessful search, my framer happens to call. He suggests foam core and he happens to have two large 40”x60” pieces available. (Did I mention this piano is almost 3/4 scale?) With utility knife in hand, I cut and shape. (Back to Home Depot for duct tape.) For extra strength there are two layers of foam core, and, recessed wood strips to attach the hinges and the hanging wire. (Hmmm, I guess all the time spent watching This Old House finally paid off.)
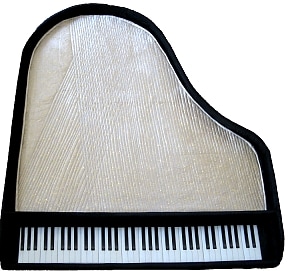
In the next step I create the quilted fabric to wrap around the frame. The piano’s soundboard is a beautiful gold metallic fabric with music notes all over and quilted so it resembles the strings. (I knew I would eventually find a good use for that fabric.) A shiny black taffeta is perfect for the frame. Digging through my fabric stash, I find the perfect fabric with piano keys printed on it. After quilting, I carefully glue all of these pieces to the frame. |
|
Now to make the lid. Here is where the difficulties of working on such a large piece become apparent. With only one layer of foam core used in the lid, the weight of the glued on quilted fabric makes it warp. Thinking I can add another layer of foam core, I try to peel off the fabric, but it is glued on tight. Now what?
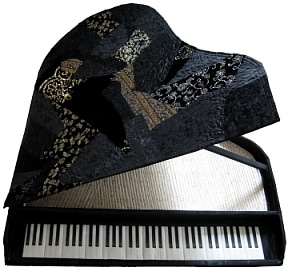
I need something thin and strong that won’t bend. Back to wandering the aisles at Home Depot. (Now up to 6 visits, the employees are definitely starting to wonder about me.) Ah, ha! Aluminum bar, thin, light weight, and strong. Perfect! I cover it in the same black taffeta and glue it to the inside of the lid. And, it looks like a design element, not a mistake. Lastly, the hinges get attached along with the hinged bar that holds the lid open. (I'm sure that bar has a name, but I don't know what it is.) |


