|
What kind of machine do you use?
I am often asked this question, especially when I am selling my artwork at a show and I have my sewing machine with me. My usual answer is, “It is a 34 year old, non-computerized Pfaff. It does what I need it to do, straight stitch and zigzag.” Now, let’s look at this question a bit deeper. If you were talking to a writer, would you ask, “What kind of computer do you use?” Highly unlikely. A computer is just a tool. Having the most advanced computer available will not make you a great writer. More RAM, faster processor speed, blah blah blah, these are all nice things to have, and they contribute to the ease of the writing process, but they do nothing to generate the ideas. The creativity, the style, the plot, these all need to come from the mind of the writer. The same idea applies to sewing machines. Like the computer, it is just a tool. Having the most advanced sewing machine on the market will not make you a great artist. While it might be nice to have a sewing machine that will do all those fancy stitches automatically, it is the human heart, mind, and hand that create a piece of artwork. So, with all that said, here are my 7 tips for buying a sewing machine:
2 Comments
 I was teasing a fellow seamstress friend of mine for not knowing the purpose of the strawberry part of a tomato pincushion. (It's filled with sand. You push your pins into it to clean off any burrs.) Well, here's one of those things I should have learned a long time ago. (Hmmm, how many years have I been sewing... Never mind!)
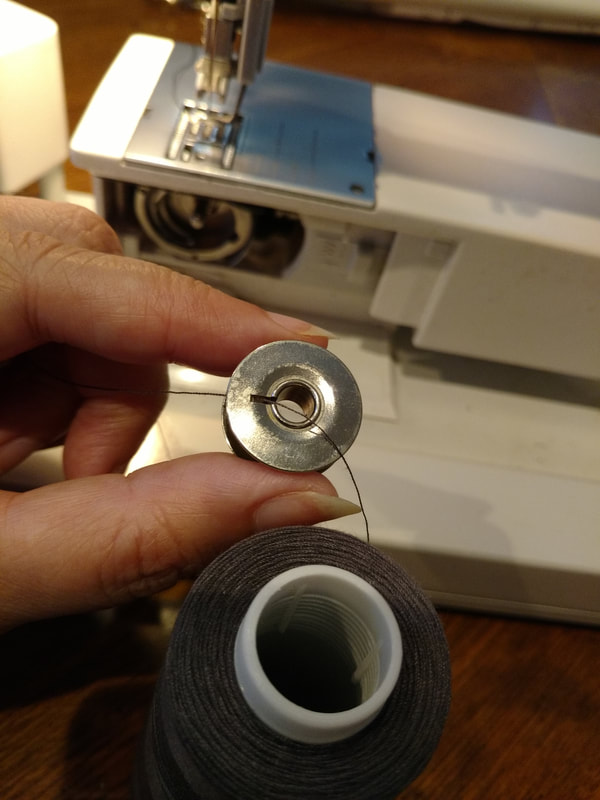
I was looking at the instruction manual for one of my sewing machines that I don't use very often. I happened to look at the page on how to wind the bobbin. Wow, I never knew that you're supposed to thread the thread through that little slot before winding. All this time I've been carefully trying to pre-wind some thread onto the bobbin to keep it from sliding out, especially with rayon threads. Threading through the slot first works so much better. You just hold onto that tail as it starts to wind. Once started, clip off the tail and you're good to sew! 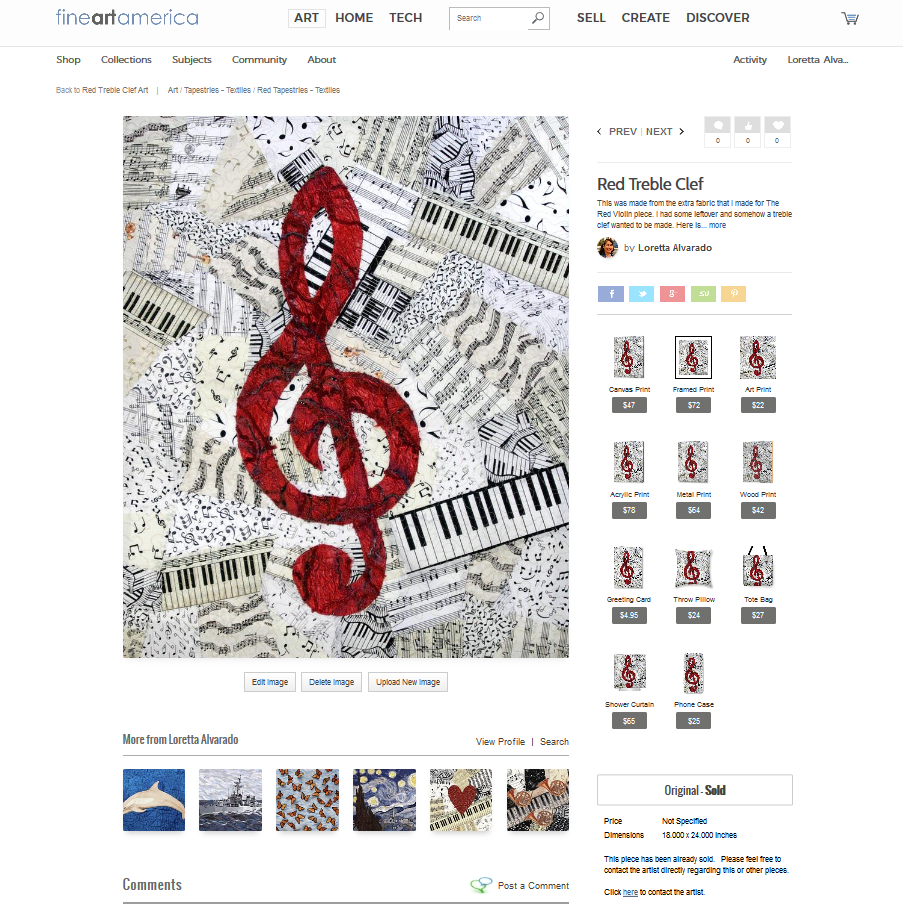
I've been busy adding my artwork to the site FineArtAmerica.com. Here's where you can find one of my favorite music themed pieces:
You can get this or any of my other pieces as a print (either framed or matted), a tote bag, cell phone case, and even a shower curtain! Visit the site by clicking the link above.
 I have slowly been adding some of the stuff from my old website back into this new one. I was reminded this past weekend at the Tall Ships Festival in Dana Point that my new website was missing all of the tutorials. So, as requested, I have added a couple of them to this new site.
Go here to see the Easy Quilt Binding Tutorial. Go here to see the Tips for Working with Metallic Thread.
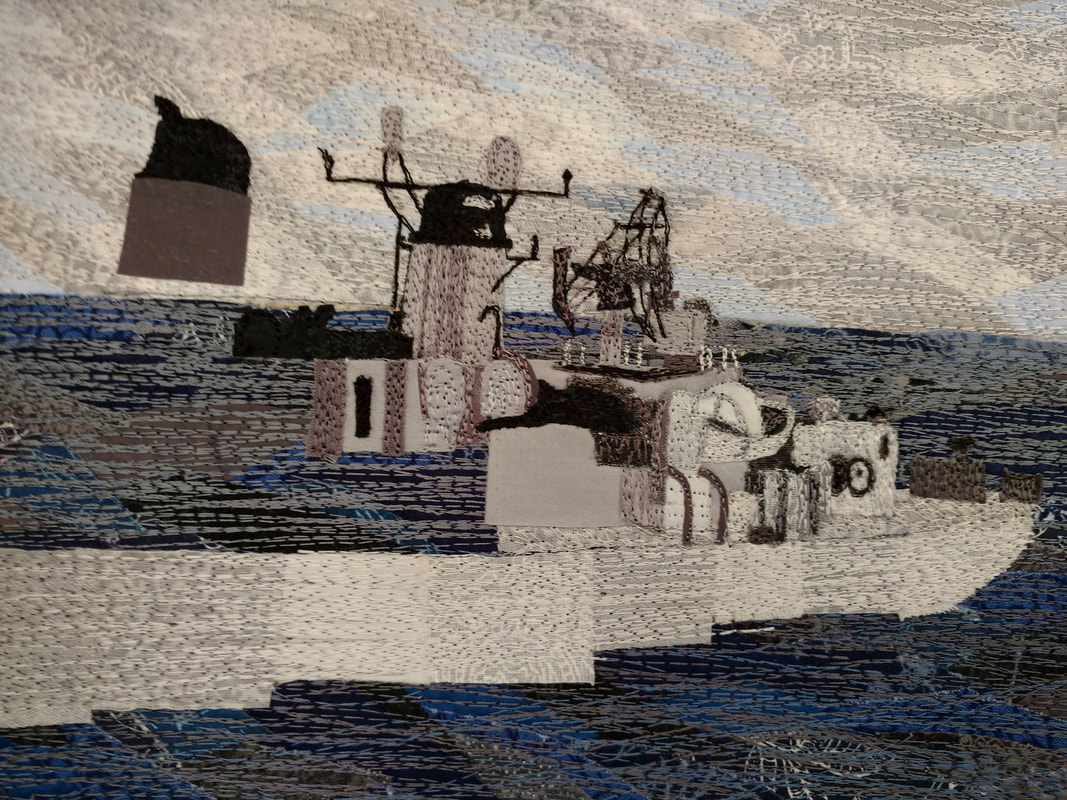
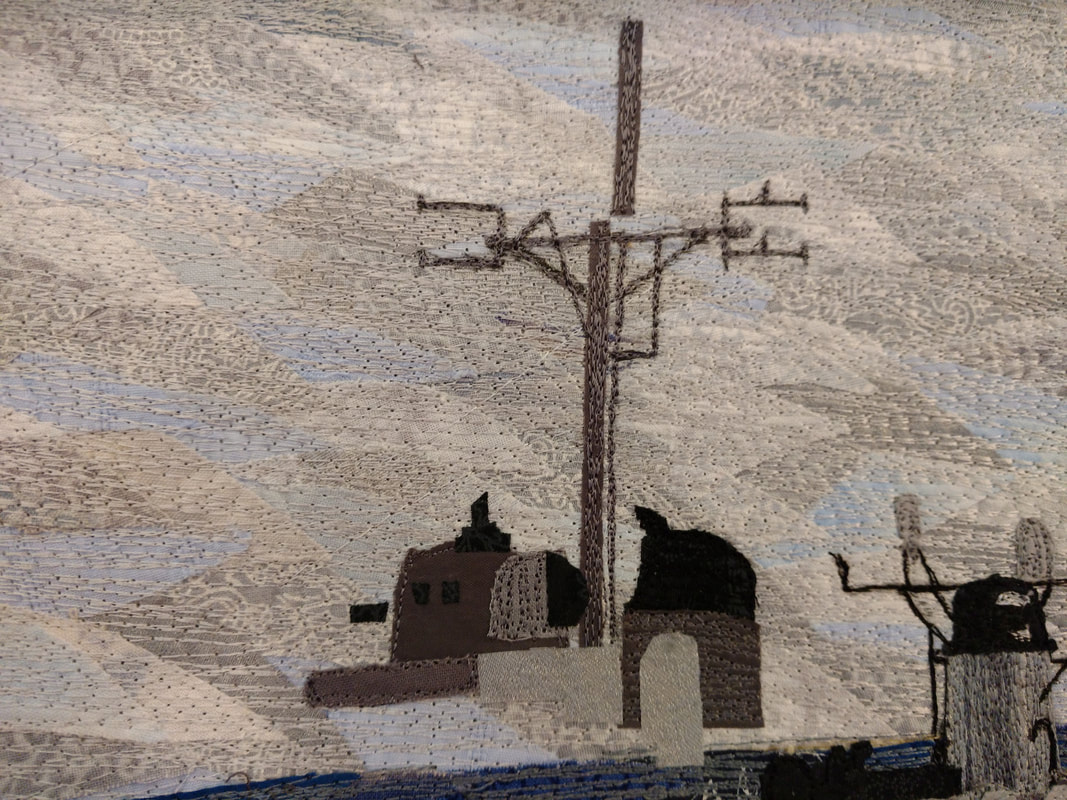
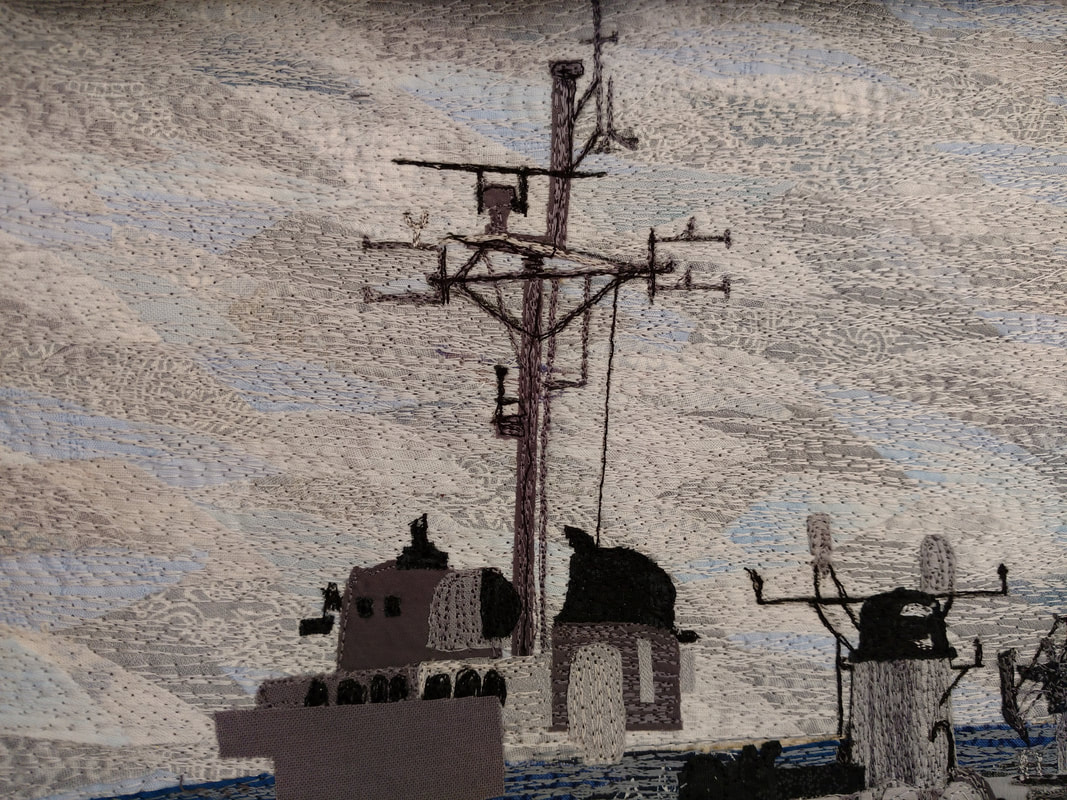
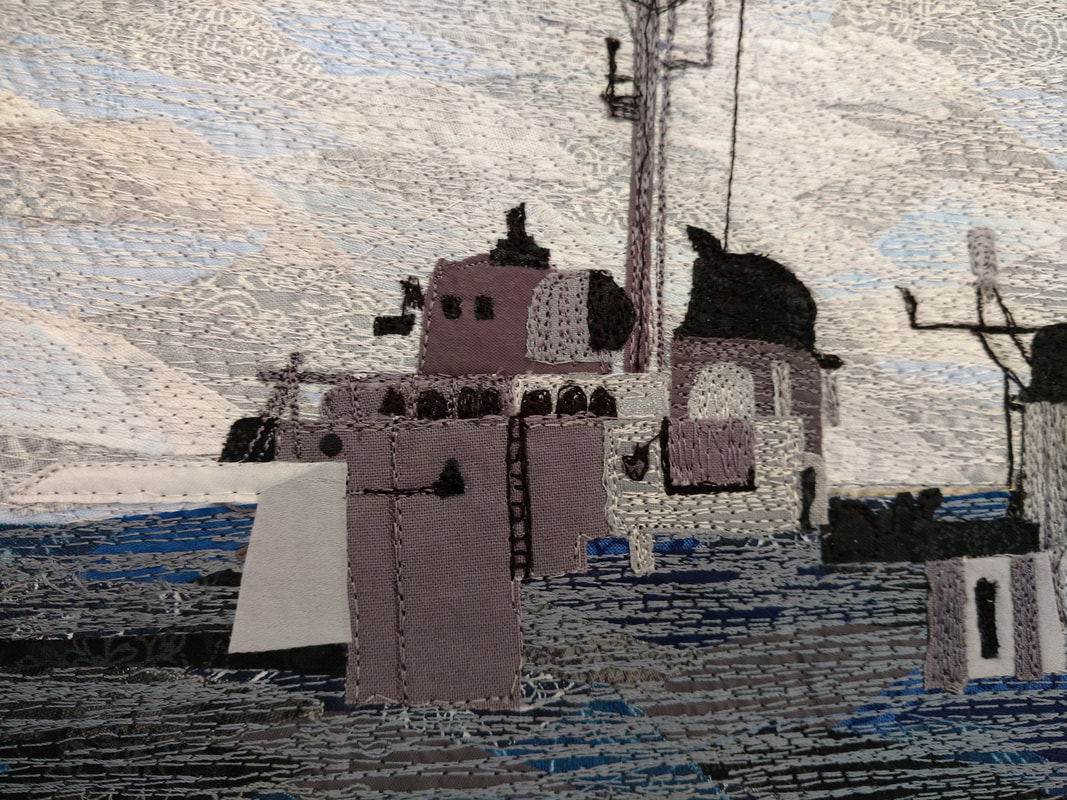
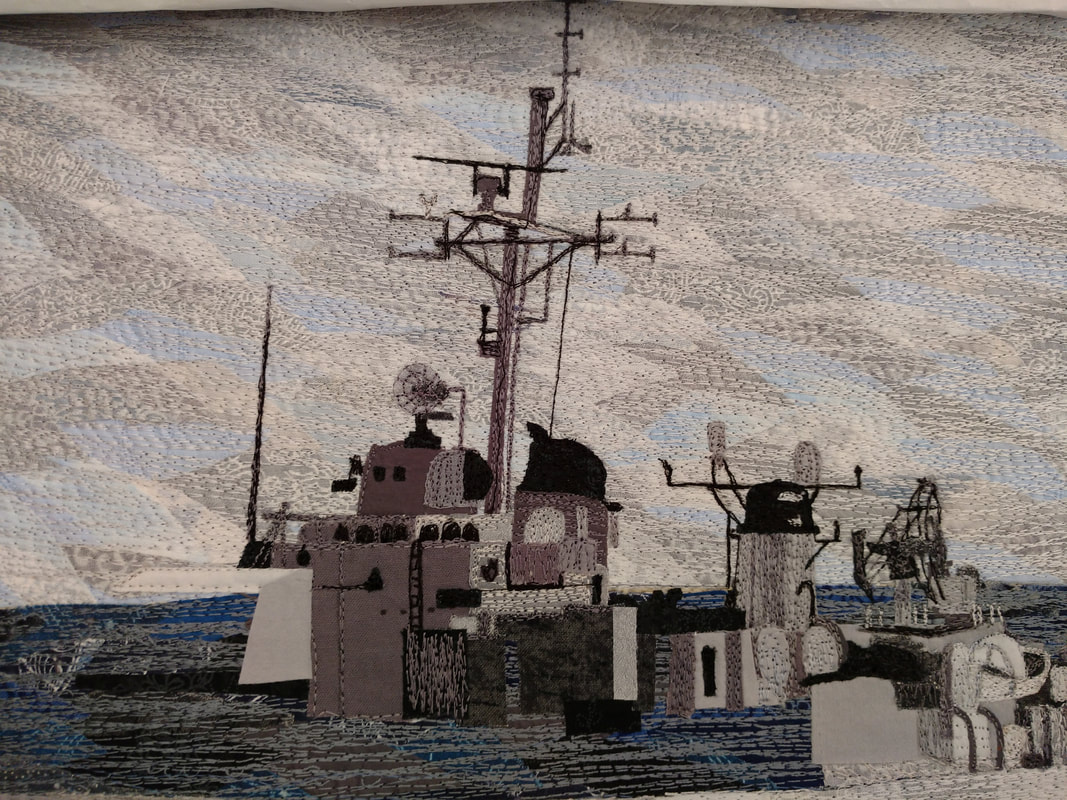
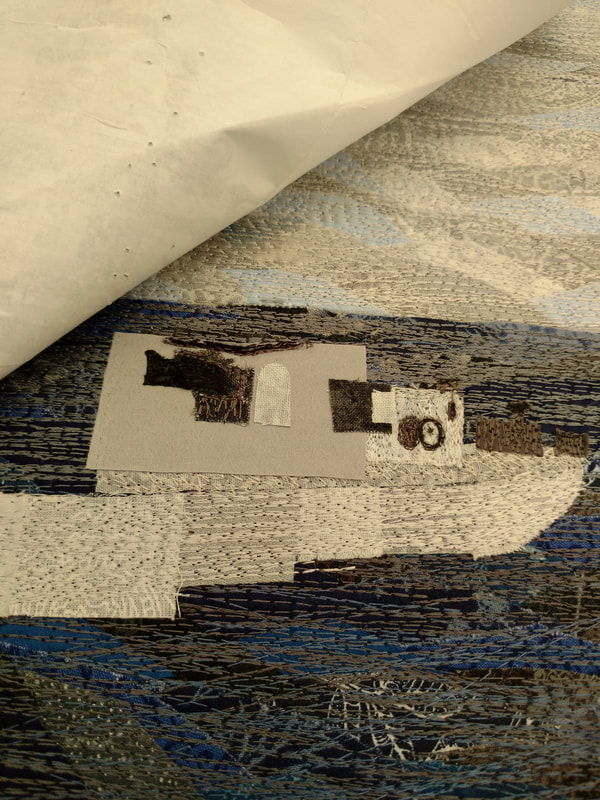
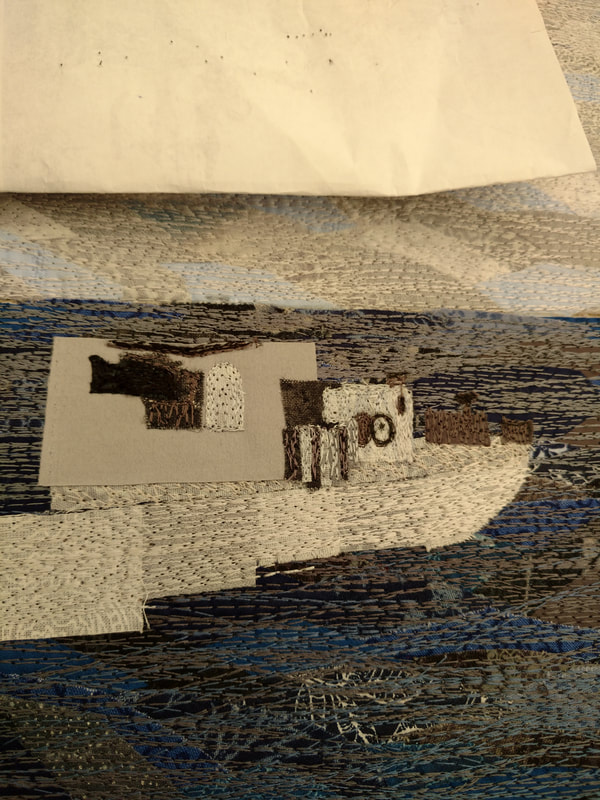
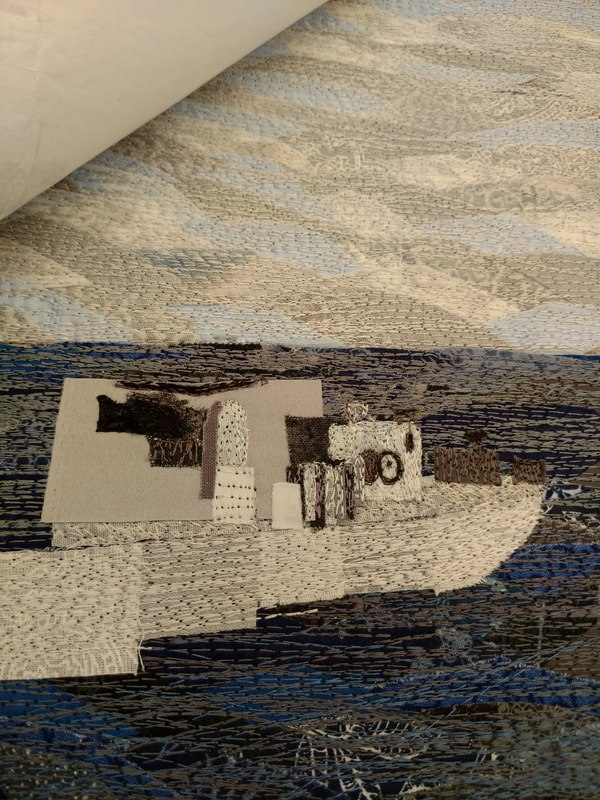
The following 4-minute video shows what it is like to stitch details into this work in progress. And, in case you're wondering, no, I did not sew through my fingers. 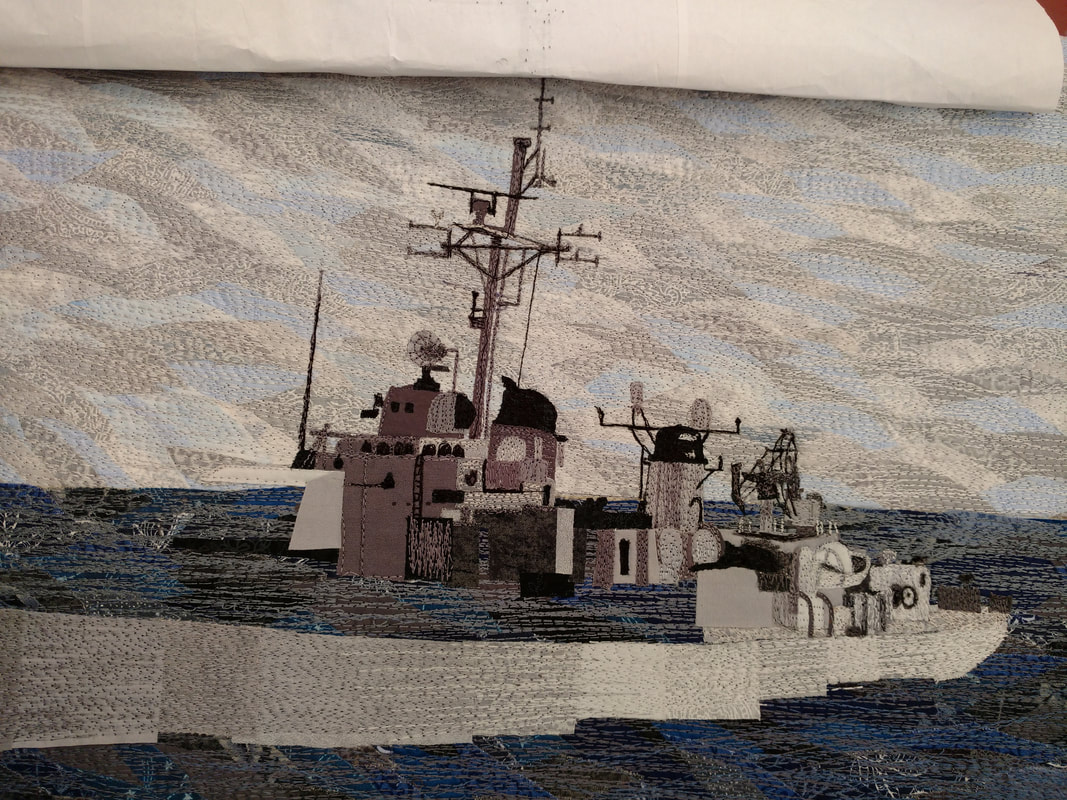 Here's what my version of the USS Floyd B. Parks looks like as of Sunday. I've made some major progress and it is really starting to look like a ship. Below are some closeup views of the details. 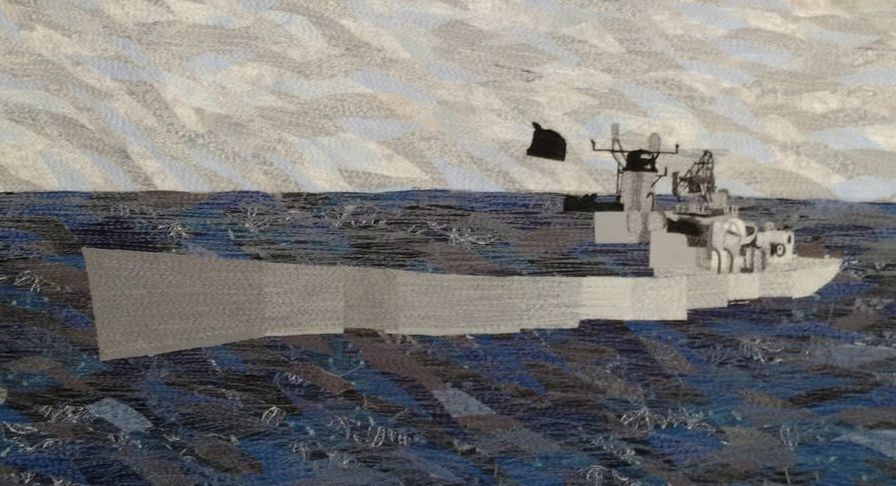 This day's progress on the USS Floyd B. Parks consisted of a few shapes and several lines. The gif below shows the progress. There were quite a few detail lines such as the antenna and the railings. I had to carefully draw the lines in and then even more carefully stitch them. I often joke that I can't draw a straight line. I think I am now going to have to amend that statement to include that I CAN draw a straight line with my sewing machine. 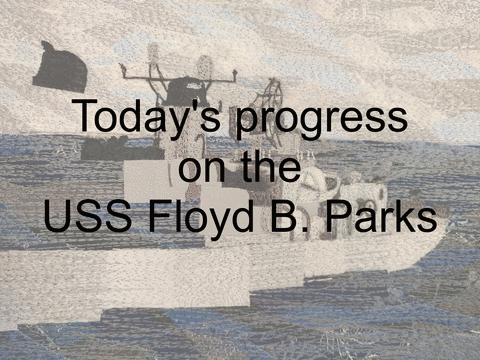 Here's a close up view of today's efforts. And yes, all of those lines were done freehand. 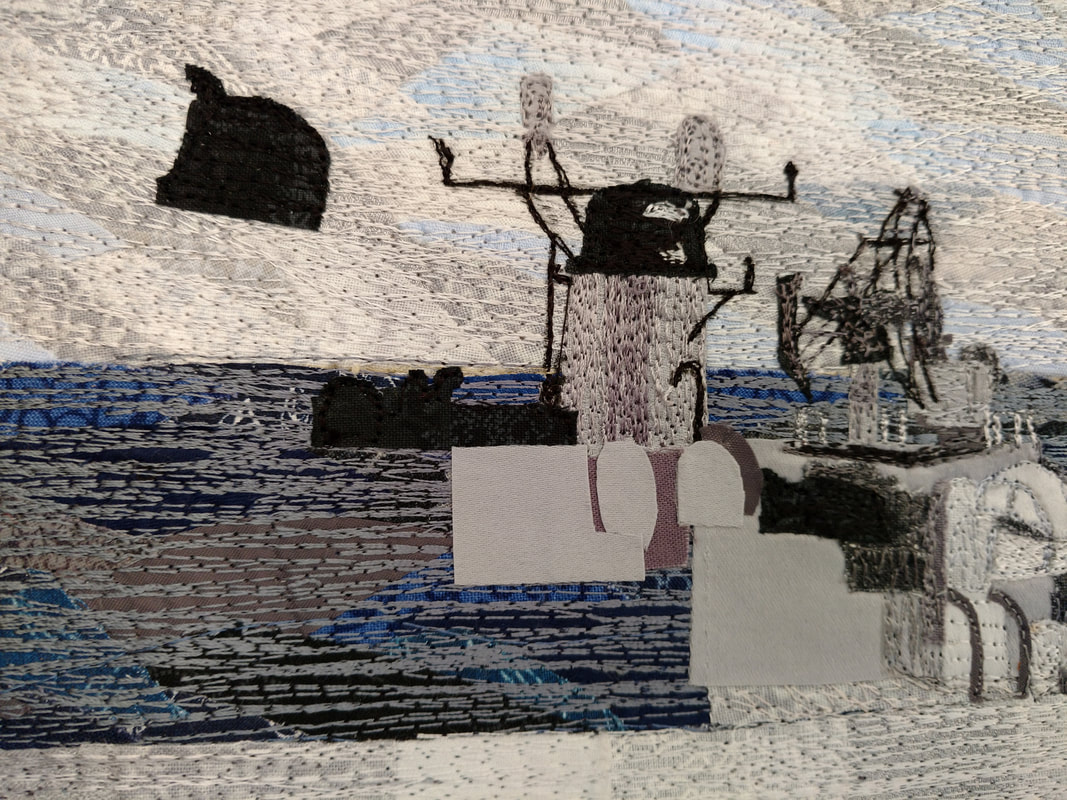 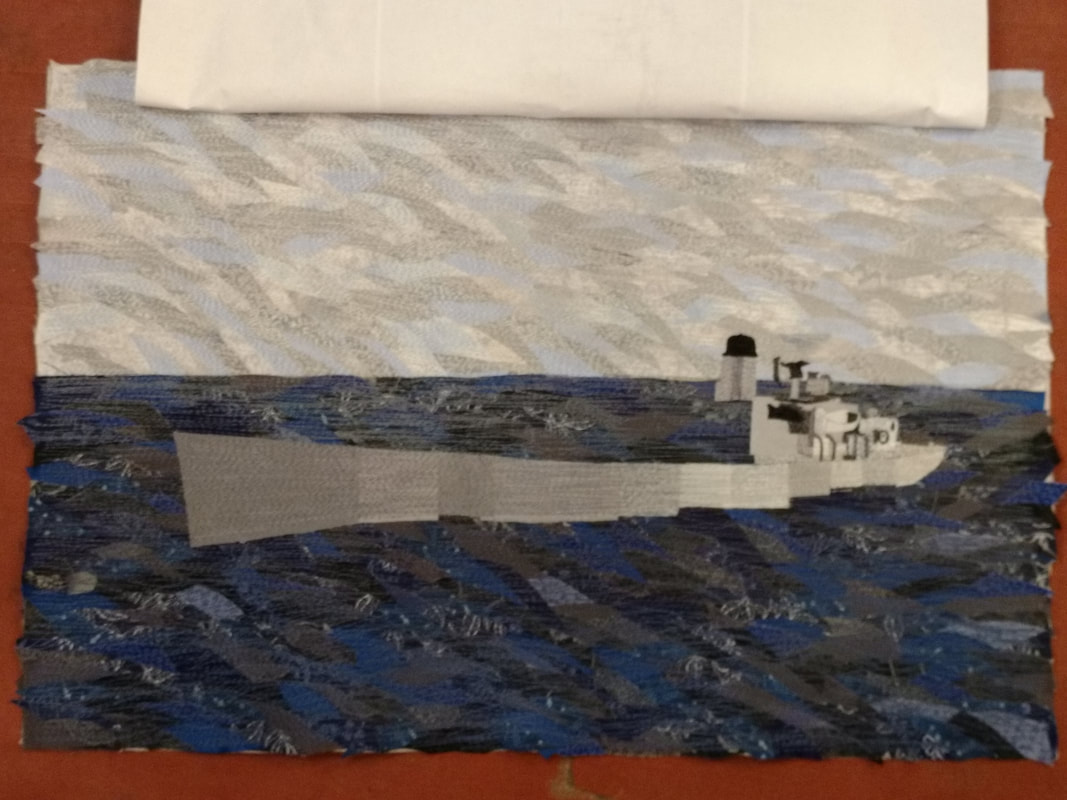 There is so much going on in this image, especially at the stern of the ship. Much of my time working on this piece right now is spent staring at the image trying to figure out what goes where and what is in front and what is behind. Below is a rundown of this day's progress. 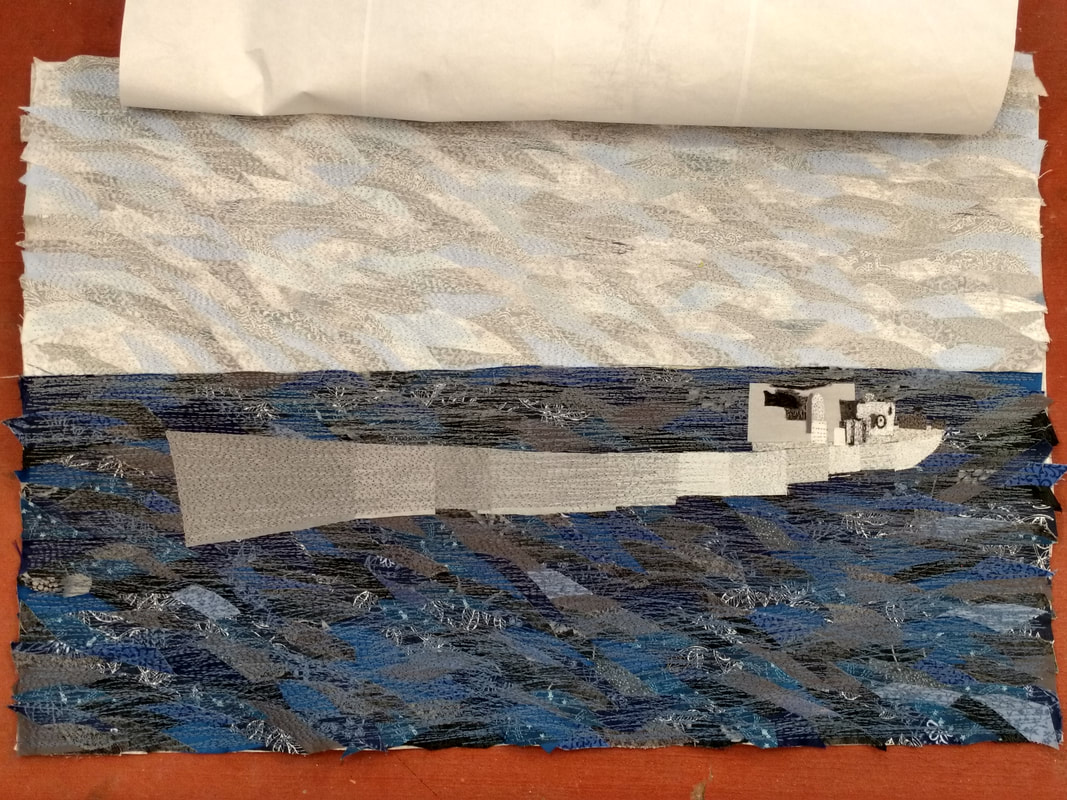 Here's what the ship looks like at this point. It still looks kinda weird. But it is starting to come together. The images below shows the progress. |
AuthorFiber Artist and Author, Loretta Alvarado Categories
All
Archives
February 2022
|


 RSS Feed
|
If you'd like to learn more about my work and my process, subscribe to my (sort of) monthly newsletter. I'll send you information about what I am working on and where you can view and purchase my latest creations. I promise I won't send you too many emails and I won't use your information for any other purpose.
|
|