|
Every year I create a special Christmas card with a new design. Most years I have been so busy selling at shows that I didn't have time to do anything fancy. This year was different. I haven't been able to do any shows this year due to the stroke I had in May. So, this presented me with the opportunity to take my time with the cards. So, for your enjoyment, here is my process for this year's fiber art Christmas tree cards. 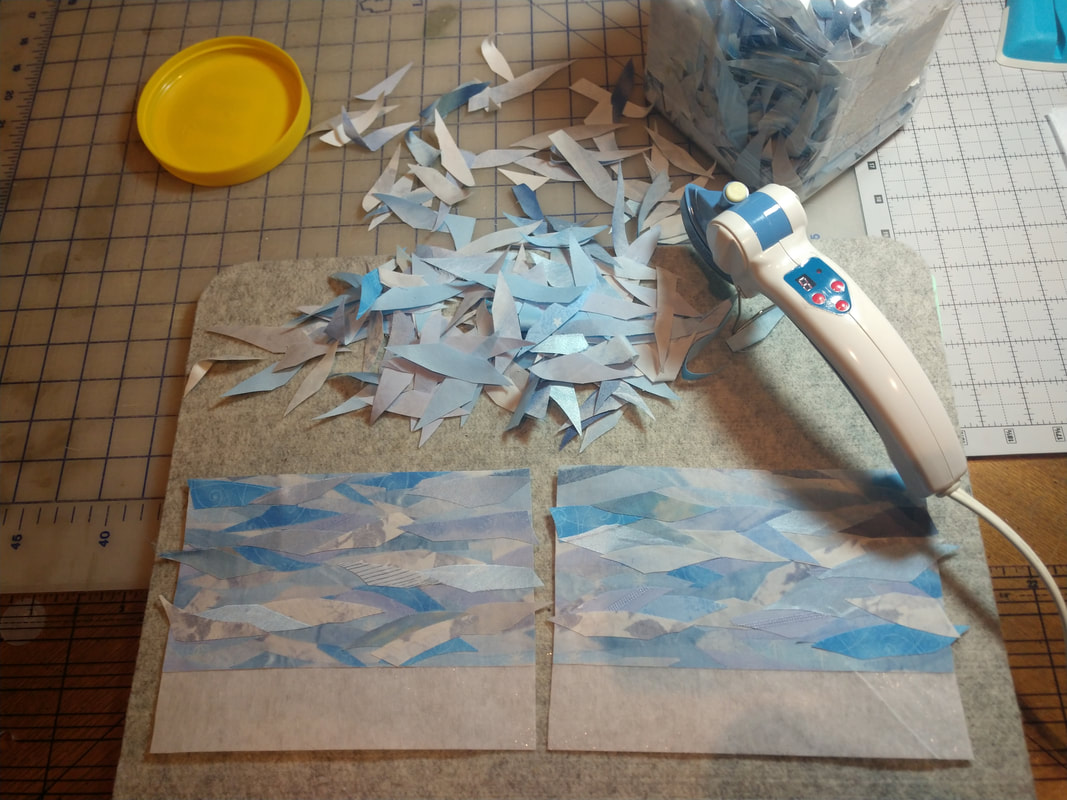 First I lay out the sky. These are tiny little pieces of fabric. I have attached a heat activated glue (Wonder Under) to the back of the fabric before cutting. Then I use my mini iron to attach the pieces to some heavy interfacing. 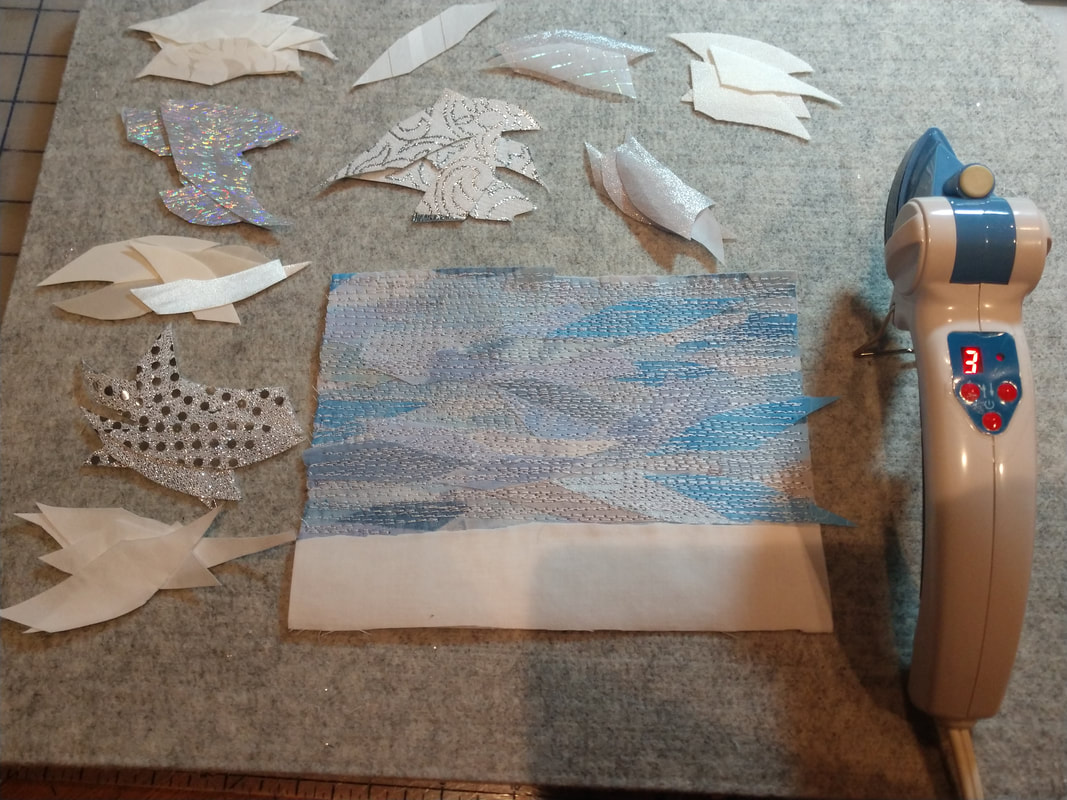 After stitching the sky, I lay out the snow fabrics. The sky is stitched with a lot of thread with a long stitch. The stitching blends the different color fabrics together much like a painter blends paints on a canvas. The snow is stitched using the free motion foot. That means I can more easily control the placement of the stitches to follow the curves of the snow banks.  Next is the tree. First the tree trunk is stitched down. Then I iron the green fabric for the basic tree shape. 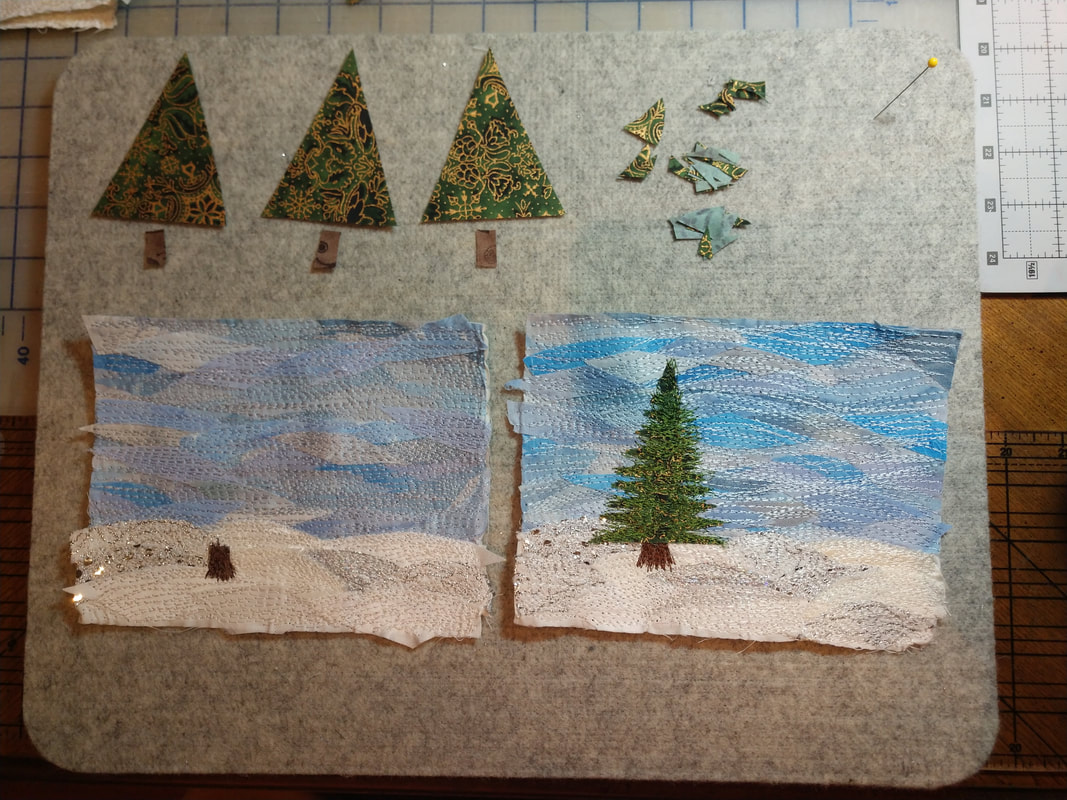 For the tree I use a green thread and free motion work to get the look of pine needles. 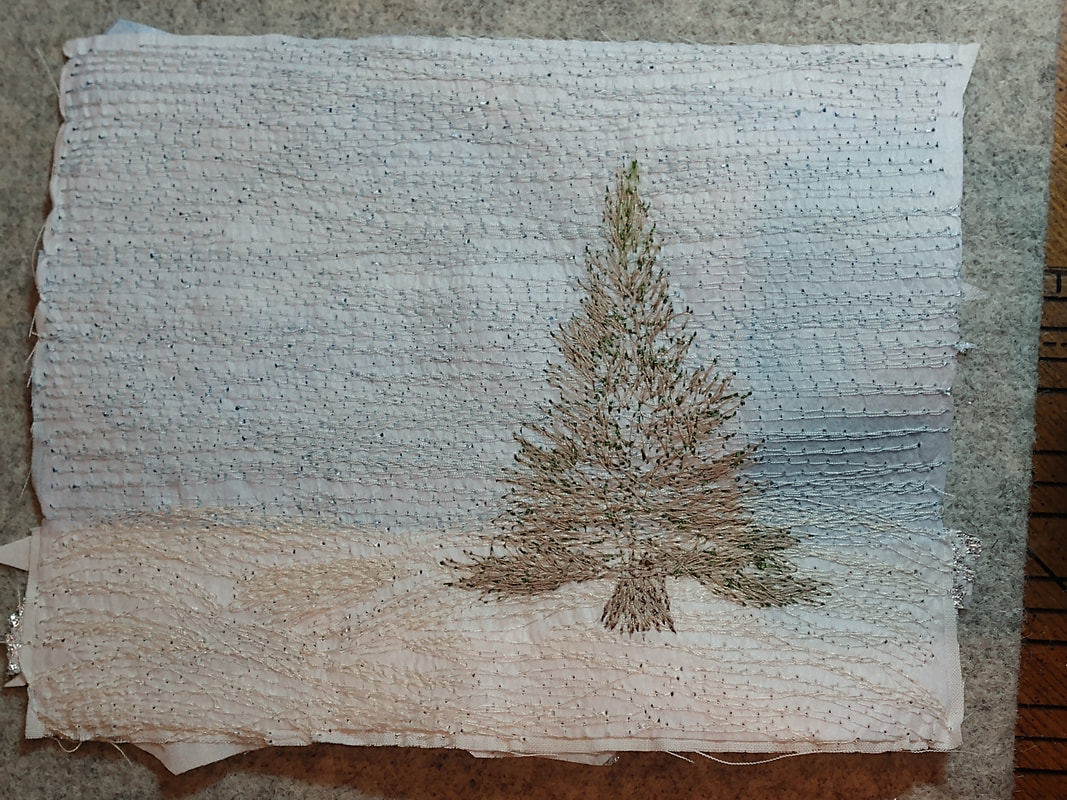 Here's what the back looks like so you can see all the stitching. 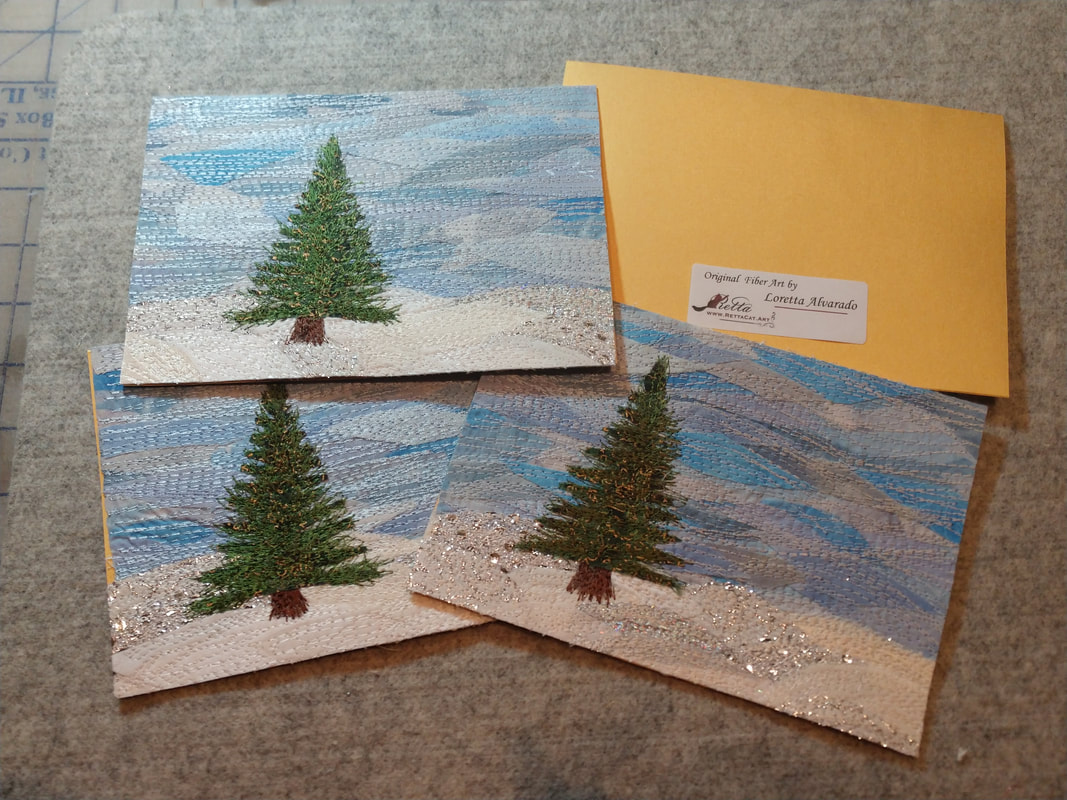 Lastly I glue the artwork onto card stock, trim off the excess, add my label, and sign and number the cards. And now they're ready to go out in the mail.
1 Comment
Rema Ramakrishnan
12/22/2023 07:52:53 pm
One of the most beautiful things I’ve seen. I’m speechless! Leave a Reply. |
AuthorFiber Artist and Author, Loretta Alvarado Categories
All
Archives
February 2022
|
 RSS Feed
|
If you'd like to learn more about my work and my process, subscribe to my (sort of) monthly newsletter. I'll send you information about what I am working on and where you can view and purchase my latest creations. I promise I won't send you too many emails and I won't use your information for any other purpose.

|
|